
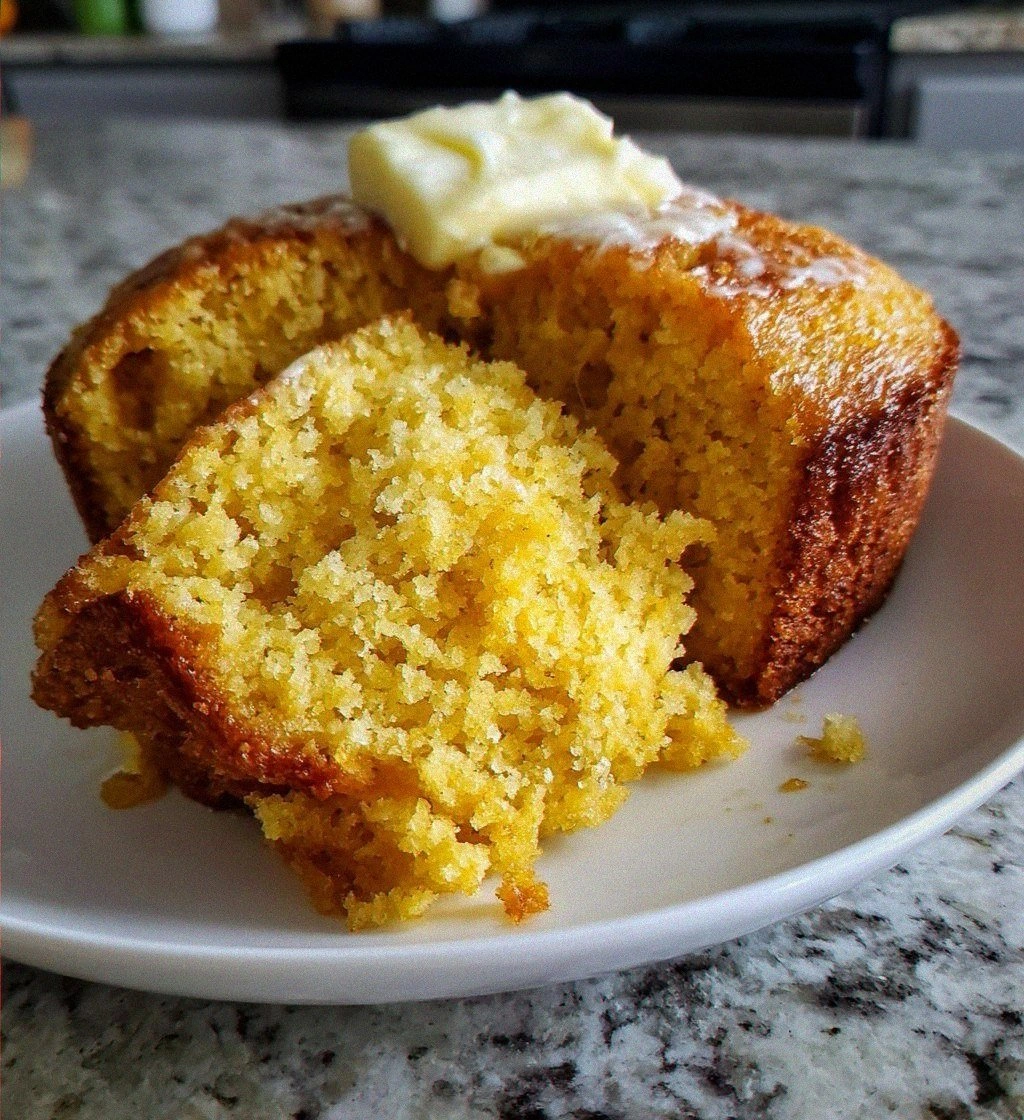
I still remember the first time I walked into my grandmother’s kitchen on a crisp autumn afternoon, the scent of butter and corn mingling with the faint aroma of pine from the open window. The old cast‑iron skillet on the stove was already humming, and when she lifted the lid of a golden‑brown cake, a cloud of sweet, buttery steam rose like a warm invitation. That moment, the way the crust crackled softly as she sliced into it, is the memory that sparked my lifelong love affair with cornbread cake—a humble yet unforgettable treat that feels like a hug in every bite. The texture is a perfect marriage of tender crumb and a slightly crisp edge, while the flavor dances between sweet, buttery, and a whisper of corn‑nutty goodness.
What makes this recipe stand out is not just the simplicity of the pantry staples, but the subtle tricks that turn an everyday bake into a show‑stopper. Imagine serving a slice that glistens with a caramelized top, the interior moist enough to melt on your tongue, and a hint of vanilla that lingers like a pleasant afterthought. The secret isn’t a fancy ingredient; it’s the balance of technique, timing, and a few love‑filled shortcuts that I’ve gathered over decades of family gatherings. Have you ever wondered why the cornbread cake at your favorite diner tastes so much richer than the one you make at home? The answer lies in a few details I’m about to share, and trust me, you’ll want to try them right away.
But wait—there’s a twist that most home cooks miss, and it’s the key to achieving that airy, melt‑in‑your‑mouth crumb while keeping the crust delightfully crisp. I’ll reveal that hidden gem a little later, after we walk through the ingredient lineup and the step‑by‑step process. By the time you finish reading, you’ll have a clear picture of how each component works together, and you’ll be armed with insider tips that even seasoned bakers will appreciate. The best part? This cake is versatile enough to serve as a breakfast treat, a comforting dessert, or even a sweet side for a spicy barbecue.
Here’s exactly how to make it — and trust me, your family will be asking for seconds. Grab a mixing bowl, preheat that oven, and let’s embark on a culinary adventure that will fill your home with the aroma of nostalgia and new memories alike. Ready? Let’s dive in and uncover the magic behind the perfect Cornbread Cake.
🌟 Why This Recipe Works
- Flavor Depth: The combination of cornmeal and all‑purpose flour creates a layered taste where the sweet corn notes shine through while the wheat flour adds a subtle, buttery backdrop. This duo ensures each bite feels both rustic and refined.
- Texture Harmony: Finely ground cornmeal gives the cake a tender crumb, while the baking powder lifts the batter, producing a light, airy interior that contrasts beautifully with a crisp, golden crust.
- Ease of Preparation: All ingredients are pantry staples, meaning you can whip up this cake without a special trip to the store. The method is straightforward, perfect for both beginners and seasoned bakers.
- Time Efficiency: From start to finish, the process takes under an hour, making it ideal for a quick weekday dessert or a weekend family brunch.
- Versatility: This base can be customized with add‑ins like jalapeños, blueberries, or a drizzle of honey, allowing you to tailor the cake to any season or occasion.
- Nutrition Balance: While indulgent, the recipe provides a modest amount of protein from the eggs and a satisfying dose of whole‑grain goodness from the cornmeal, making it a comforting yet reasonably balanced treat.
- Ingredient Quality: Using whole‑milk and high‑quality cornmeal elevates the flavor profile, turning a simple cake into a memorable experience.
- Crowd‑Pleasing Factor: Its sweet‑savory edge appeals to both kids and adults, ensuring it disappears from the plate faster than you can say “second helping.”
🥗 Ingredients Breakdown
The Foundation
The backbone of our Cornbread Cake is the 1 cup of cornmeal. Using finely ground cornmeal is crucial because it blends seamlessly with the flour, giving the cake a smooth texture rather than a gritty one. If you can, choose a stone‑ground variety for a slightly richer flavor that hints at toasted corn. Pair that with 1 cup of all‑purpose flour, which provides the structure needed to hold the cake together while still allowing it to rise beautifully. For a healthier twist, you could swap half of the flour for whole‑wheat, but keep in mind that this will introduce a denser crumb.
Sweeteners & Leaveners
Next comes 1 cup of granulated sugar. This amount gives the cake its signature sweet‑golden hue and ensures a moist interior. If you prefer a deeper caramel note, you can substitute half of the sugar with brown sugar, but remember that this will add a subtle molasses flavor. The 1 tablespoon of baking powder is the magic wand that lifts the batter, creating that light, airy texture we all love. Pair it with ½ teaspoon of salt to balance the sweetness and enhance the corn’s natural flavor.
Moisture Makers
The wet ingredients are where the cake gets its luscious, melt‑in‑your‑mouth quality. 1 cup of whole milk adds richness and helps the flour and cornmeal hydrate evenly. If you’re dairy‑free, almond milk or oat milk work well, though the flavor will shift slightly. ½ cup of vegetable oil keeps the crumb moist; you can substitute melted butter for a richer, buttery taste, but keep an eye on the oven time as butter browns faster. The 2 large eggs act as binders, giving the cake structure and a tender crumb, while also contributing to a golden color.
Flavor Enhancers
Finally, the subtle yet essential 1 teaspoon of vanilla extract adds a fragrant undertone that rounds out the sweetness and pairs beautifully with the corn flavor. If you’re feeling adventurous, a pinch of cinnamon or nutmeg can add a warm spice note, especially for fall gatherings. Choosing high‑quality vanilla—whether pure extract or a vanilla bean paste—makes a noticeable difference in the final aroma.
With your ingredients prepped and ready, let's get cooking. Here's where the fun really begins...
🍳 Step-by-Step Instructions
Preheat your oven to 350°F (175°C) and place a 9‑inch round cake pan or a cast‑iron skillet inside to heat up. The heat of the pan will give the cake a beautifully crisp bottom, much like a southern skillet cornbread. While the oven warms, take a moment to line the pan with parchment paper if you’re using a cake pan, or lightly grease the skillet with a dab of butter. This initial heat helps the batter start cooking immediately upon contact, creating that coveted golden crust.
💡 Pro Tip: If you use a cast‑iron skillet, pre‑heat it for about 5 minutes; a hot pan ensures the edges set fast, locking in moisture.In a large mixing bowl, whisk together the 1 cup of cornmeal, 1 cup of all‑purpose flour, 1 cup of sugar, 1 tablespoon of baking powder, and ½ teaspoon of salt. As you whisk, notice how the dry ingredients start to form a fine, slightly fluffy cloud—this is the first sign that the leavening is ready to work its magic. Make sure there are no lumps; a smooth dry mix guarantees an even rise later on.
In a separate bowl, combine the wet ingredients: 1 cup of whole milk, ½ cup of vegetable oil, 2 large eggs, and 1 teaspoon of vanilla extract. Beat them together until the mixture is uniformly pale and slightly thickened. The eggs should become glossy, indicating they’ve been properly emulsified with the oil and milk, which helps create a tender crumb.
Create a well in the center of the dry mixture and pour the wet mixture into it. Gently fold with a rubber spatula, moving from the center outward, until the batter is just combined. Be careful not to over‑mix; a few streaks of flour are okay. Over‑mixing can develop gluten, leading to a tougher cake, and that’s a mistake you’ll want to avoid.
⚠️ Common Mistake: Stirring the batter until it’s smooth will make the cake dense. Stop as soon as you see a uniform texture.Give the batter a quick visual check: it should be thick but pourable, resembling a soft pancake batter. If it looks too thick, whisk in a tablespoon of milk; if too runny, sprinkle a little extra flour. This is the moment where intuition meets science—adjusting the consistency ensures a perfect crumb.
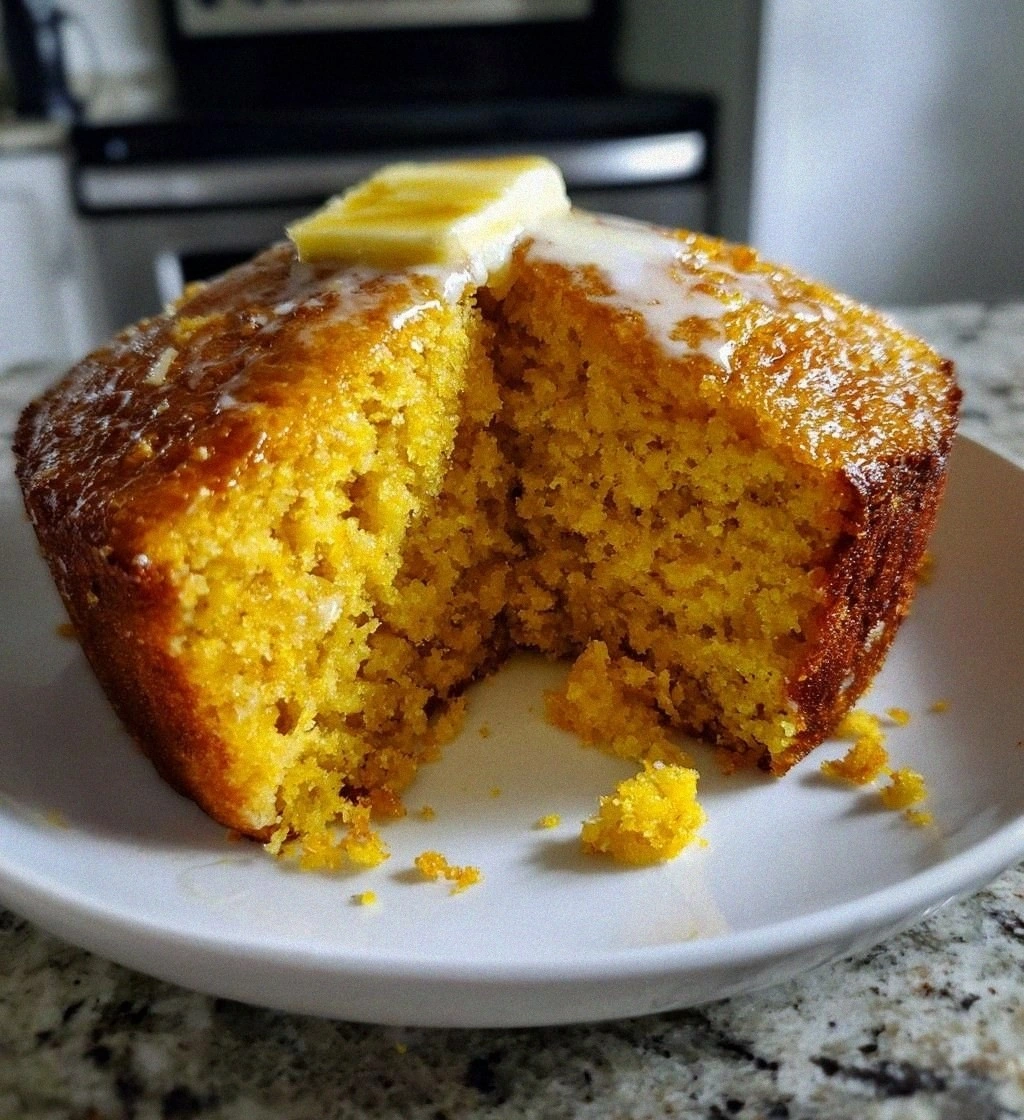
Carefully pour the batter into the pre‑heated pan, spreading it evenly with a spatula. You’ll hear a gentle sizzle as the batter meets the hot surface, a sound that promises a crisp edge. For an extra touch of sweetness, sprinkle a light dusting of coarse sugar on top before sliding the pan into the oven.
💡 Pro Tip: Swirl a teaspoon of melted butter over the surface before baking for a glossy, buttery finish.Bake for 25‑30 minutes, or until the top turns a deep golden brown and a toothpick inserted into the center comes out clean. Around the 20‑minute mark, you’ll notice the edges pulling away slightly from the pan—a sign that the cake is set and ready for the final minutes of browning. Trust your nose: the aroma will become unmistakably sweet and buttery, filling the kitchen with a warm invitation.
Remove the cake from the oven and let it rest for 10 minutes in the pan. This resting period allows the steam to finish cooking the interior gently, preventing a soggy bottom. Afterward, run a thin knife around the edge, invert onto a serving plate, and watch the golden crust glisten under the light.
Serve warm, perhaps with a dollop of whipped cream, a drizzle of honey, or a scoop of vanilla ice cream. The cake is delicious on its own, but a little extra topping can elevate it to dessert‑star status. And that’s the secret—simple ingredients, thoughtful technique, and a dash of love create a cake that feels both nostalgic and brand‑new.
And there you have it! But before you dig in, let me share some tips that will take this from great to absolutely unforgettable…
🔐 Expert Tips for Perfect Results
The Taste Test Trick
Before you commit the batter to the oven, give it a quick taste. A pinch of extra vanilla or a splash of milk can balance the sweetness if you feel it’s too sugary. Trust your palate; a small adjustment now prevents a major correction later.
Why Resting Time Matters More Than You Think
Allowing the cake to rest for ten minutes after baking lets the crumb set and the flavors meld. Skipping this step can result in a cake that looks perfect but feels slightly gummy when cut. I once sliced straight out of the oven and the texture was off; a brief pause made all the difference.
The Seasoning Secret Pros Won’t Tell You
A pinch of sea salt on the top right before baking can amplify the sweet notes and give a sophisticated flavor contrast. It’s a technique used by pastry chefs to make desserts sing, and it works wonders on cornbread cake too.
Butter vs. Oil – The Flavor Debate
While oil keeps the cake moist, melted butter adds depth. If you have time, try a ¼ cup butter plus ¼ cup oil combo; you’ll get the best of both worlds—rich flavor and a tender crumb.
The Cool‑Down Slice
For the cleanest slices, let the cake cool on a wire rack for at least 15 minutes after the initial rest. The cooling air prevents steam from making the bottom soggy, and each piece holds its shape beautifully.
🌈 Delicious Variations to Try
One of my favorite things about this recipe is how versatile it is. Here are some twists I've tried and loved:
Honey‑Lavender Dream
Add 2 tablespoons of honey to the wet mixture and a teaspoon of dried lavender buds. The honey deepens the sweetness while the lavender introduces a fragrant, floral note that feels like a spring garden in every bite.
Spicy Jalapeño Cheddar
Fold in ½ cup of shredded sharp cheddar and 1 finely diced jalapeño (seeds removed for less heat). The cheese melts into pockets of gooey richness, and the jalapeño provides a gentle kick that balances the cake’s sweetness.
Blueberry Burst
Gently stir in 1 cup of fresh or frozen blueberries right before baking. The berries burst during cooking, leaving pockets of juicy sweetness that contrast beautifully with the corn’s earthy flavor.
Maple Pecan Crunch
Replace half of the sugar with pure maple syrup and fold in ½ cup of toasted pecans. The maple adds a caramel‑like depth, while the pecans contribute a satisfying crunch that makes each bite interesting.
Cinnamon Swirl
Mix 1 tablespoon of cinnamon and 1 tablespoon of brown sugar together, then swirl the mixture through the batter after it’s poured into the pan. The result is a marbled cake with warm spice ribbons that are perfect for chilly evenings.
Coconut Lime
Add ¼ cup shredded coconut to the dry mix and a teaspoon of lime zest to the wet mix. The coconut adds tropical texture, while the lime zest lifts the flavor with a bright, citrusy zing.
📦 Storage & Reheating Tips
Refrigerator Storage
Allow the cake to cool completely, then wrap it tightly in plastic wrap or store it in an airtight container. It will stay fresh for up to 4 days in the fridge, maintaining its moisture and flavor. For added softness, place a slice of bread on top of the cake before sealing; the bread will absorb excess dryness.
Freezing Instructions
Slice the cake into individual portions, wrap each slice in parchment paper, then place them in a freezer‑safe zip‑lock bag. The cake can be frozen for up to 3 months. When you’re ready to enjoy, thaw overnight in the refrigerator and reheat gently.
Reheating Methods
To reheat without drying out, preheat your oven to 300°F (150°C), place a slice on a foil‑lined tray, and lightly drizzle a teaspoon of milk or water over the top. Cover with foil and heat for 10‑12 minutes. The steam created by the added liquid keeps the crumb tender while reviving the crisp crust.


